What is HESK #
HESK is the software used for tracking, organizing, and resolving issues related to customer support. The main highlight of the HESK is it is simple to use and user-friendly. And it is absolutely free to use, it is lightweight, fast, and secure for reason. In this article, we are going to see the installation process of the Help Desk. and its requirements and uses.
Uses of HESK #
- Centralized Support system ( Telephone, emails)
- Organize, Prioritize (Ticket Categories, Ticket Urgency)
- Customer Help (Knowledgebase, FAQ)
System Requirements of HESK #
- PHP
- 5.3.0
- Recommended use latest stable version
- Webserver
- Apache
- Nginx
- Database
- MySQL 5.0.7
- Recommended use latest stable version
Installation of HESK #
For installation of HESK, there are 2 methods to install, you can use anyone for installation. The methods are as follows
- Installation using softaculous app installer
- Manual installation
Installation using softaculous app installer #
Softaculus is one of the methods to install HESK easily, to install Help Desk using a softaculous app installer follow the steps.
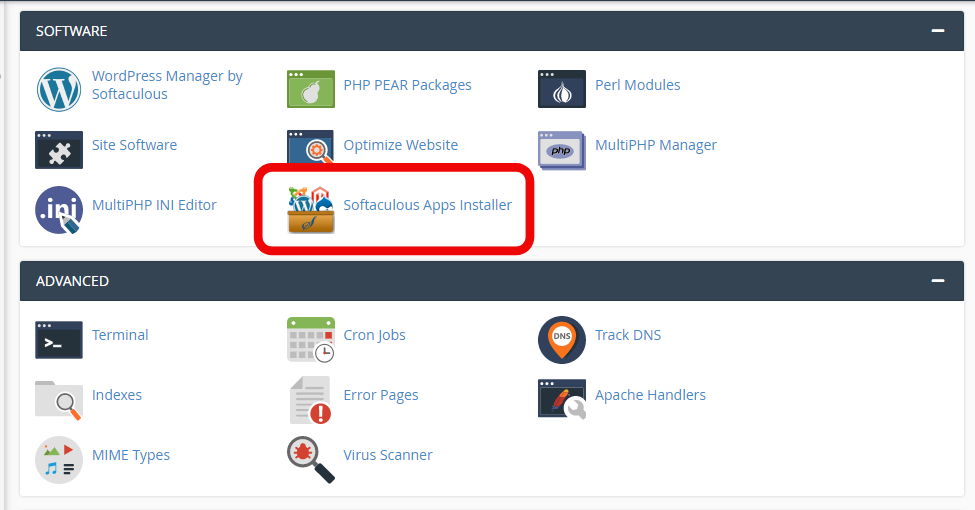
Step1: login to your hostrik Cpanel account, and in the software section click on softaculous app installer. The installation window of the softaculous app installer will open
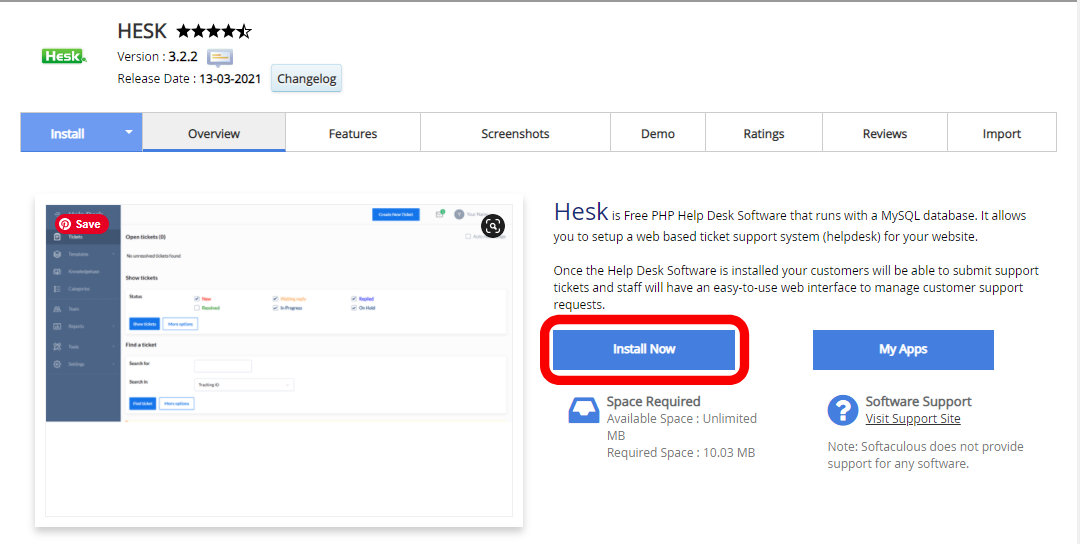
Step2: search the HESK in the search bar of the softaculous app installer, and the help desk window will open click on the install button.
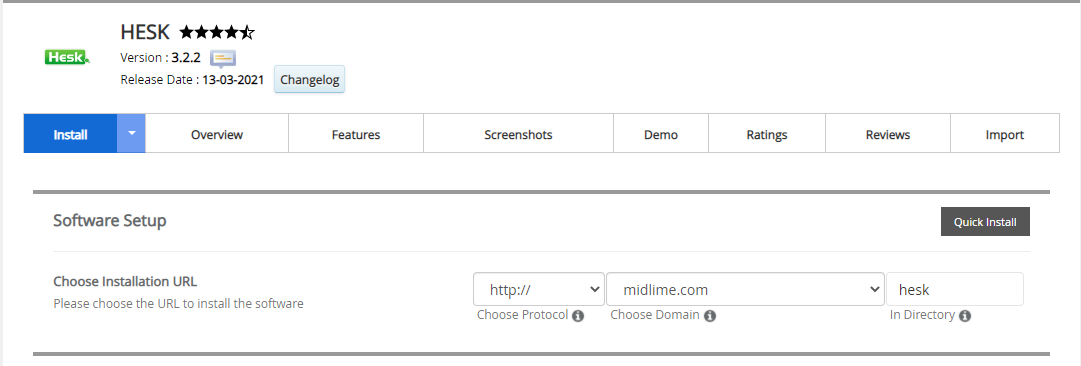
Step3: in the software setup section select the protocol for the help desk and the domain and directory to install the help desk.
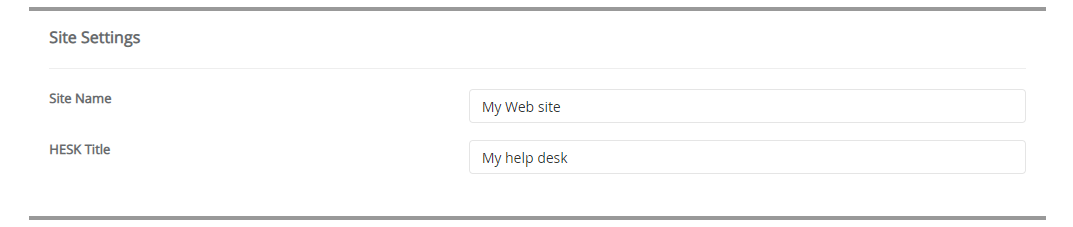
Step4: In the next section select the title for the website and also the title for the HESK.
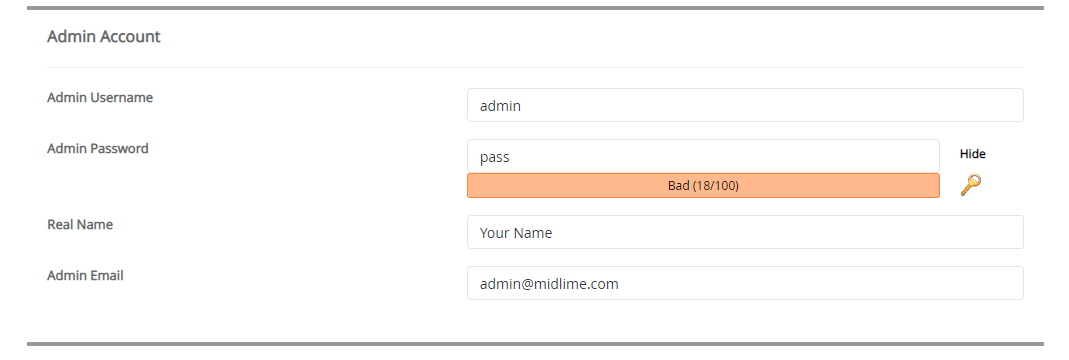
Step5: in admin account setup give the username and password for the admin account login and then give the real name of admin and email address for it.
Step6: in this section choose the language of the installation Help Desk.

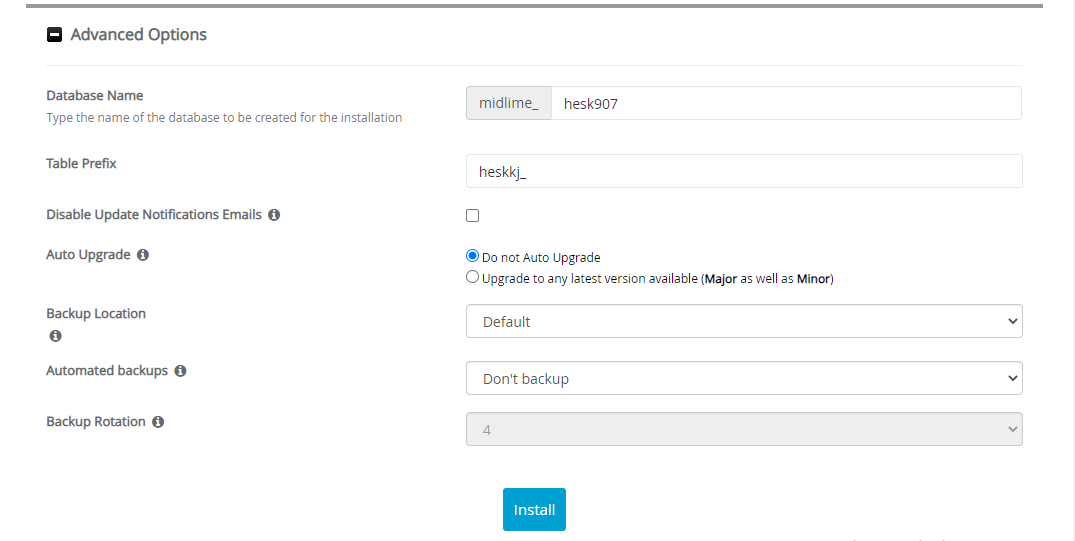
Step7: In the advanced section select database and configure database settings then click on install.
Manual installation #
For manual installation, you have to follow some steps the steps are divided into 3 parts
- File configuration
- Database creation
- HESK configuration
File configuration
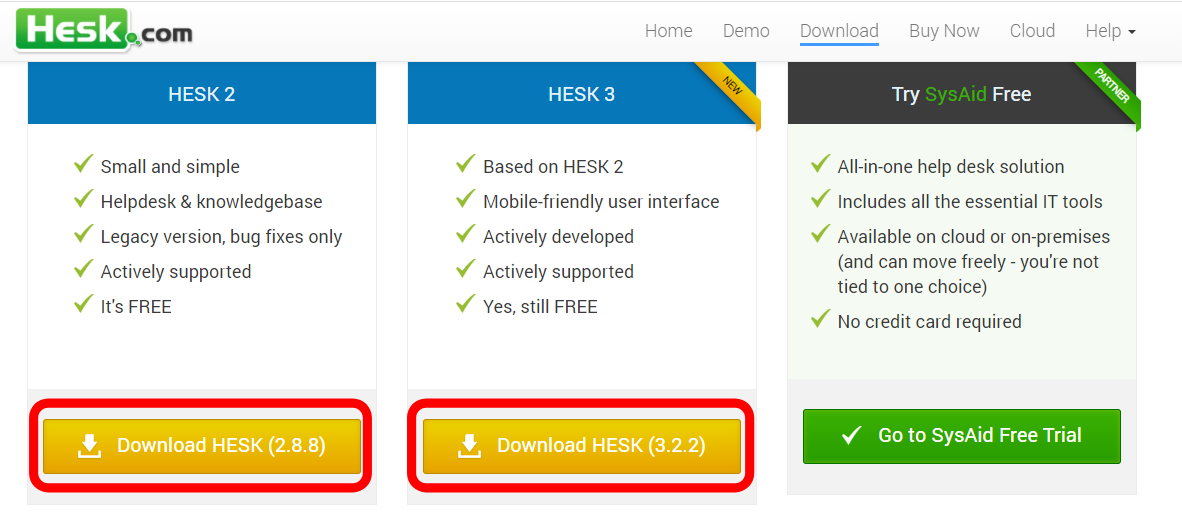
Step1: go to the official website of HESK and download the latest version of the HESK from the download section.
Step2: login to the hostrik Cpanel account, go to the file manager, and in the file manager goes to public_html, and in the public_html folder create a new folder that is mail and upload the downloaded file there and extract it.
Database creation
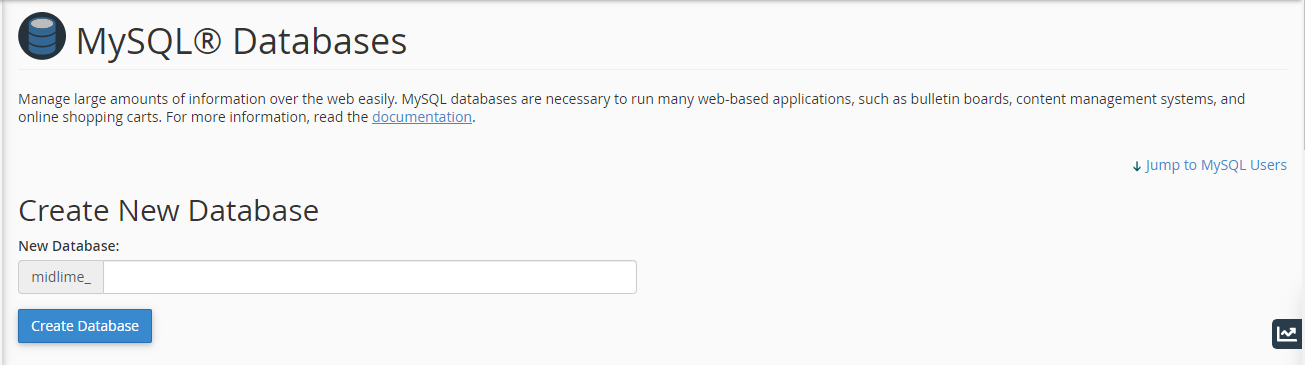
Step1: go to the database section and click on MySQL Database and create a database here. By giving the name to the database and click on create database.
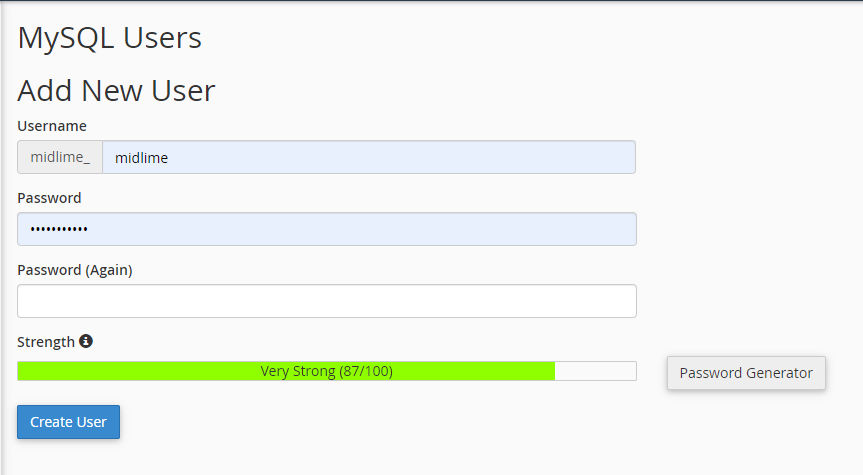
Step2: add a user to the database by giving a username and password for the user and click on create user.
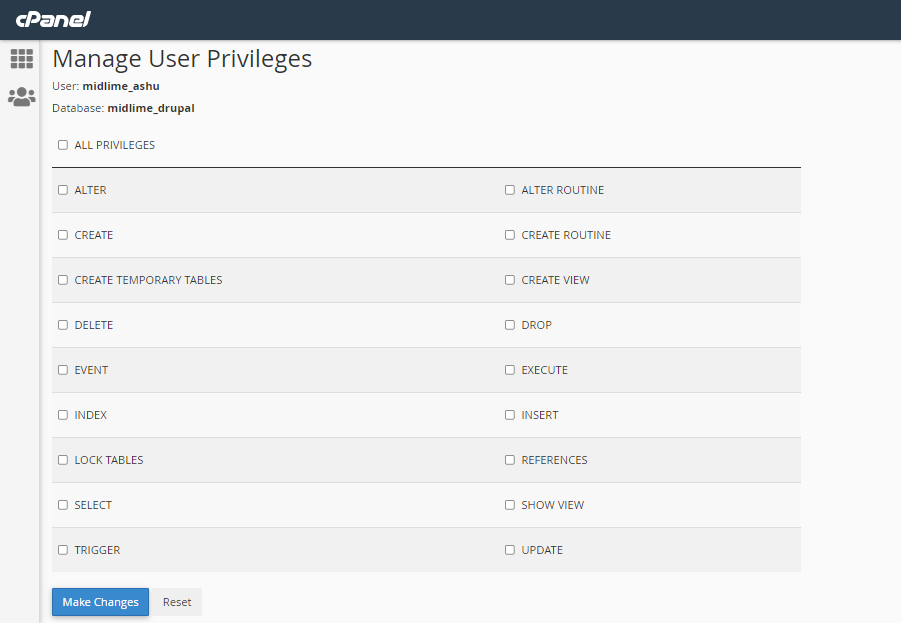
Step3: add all privileges to the user by clicking all privileges.
HESK Configure
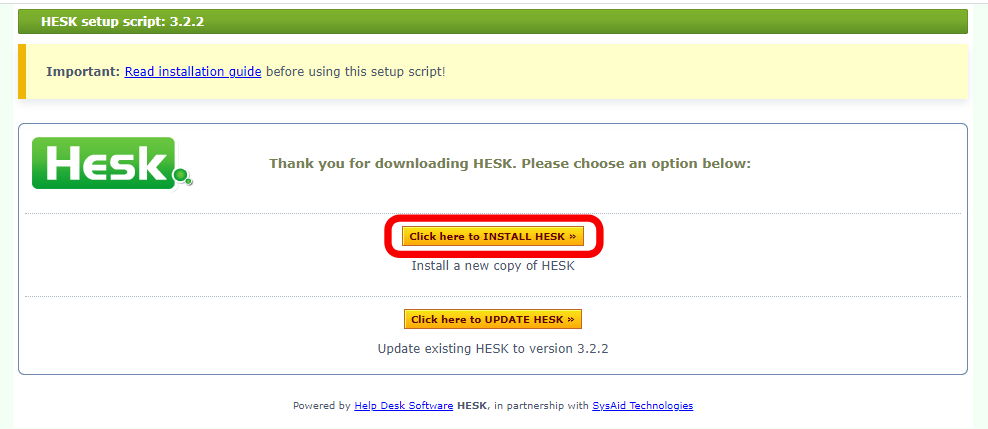
Step1: go to the URL your going to install the Help Desk, here you will get the option to install the HESK or Upgrade it. Choose install,
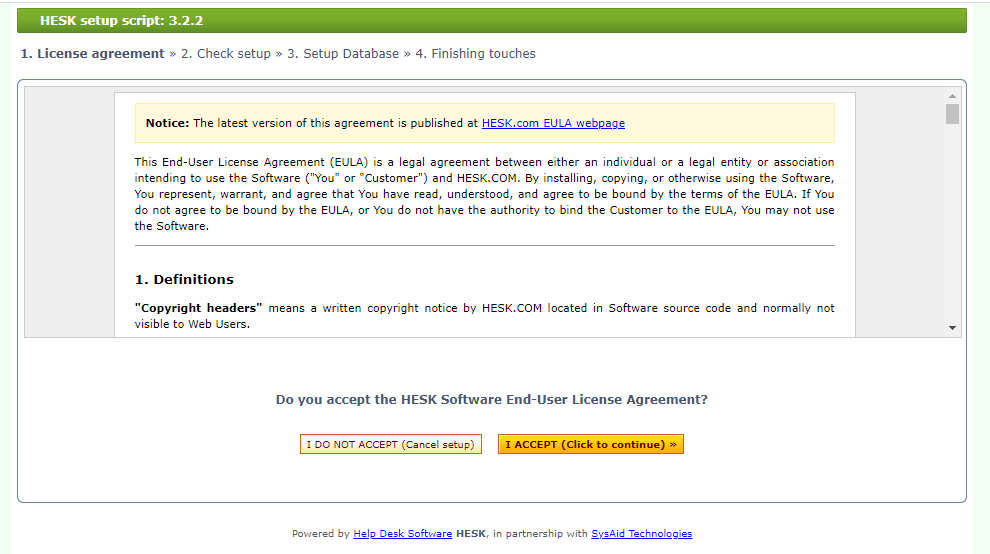
Step2: In the next step you will see the license agreement of the Help Desk read all agreements and click on I accept click to continue.
Step3: In the next step, it will check all the requirements for the installation of the Help Desk. and go to the next step.
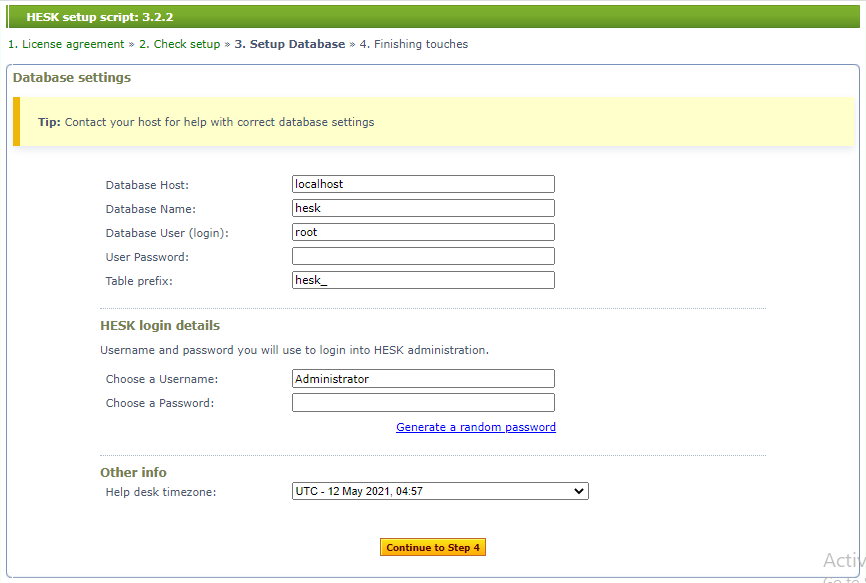
Step4: Here you will see the database setting select the database and username for it, and also give the password for it, and then in the administration section give username and password for the administrator account. in time zone select your time zone and click on continue step 4.
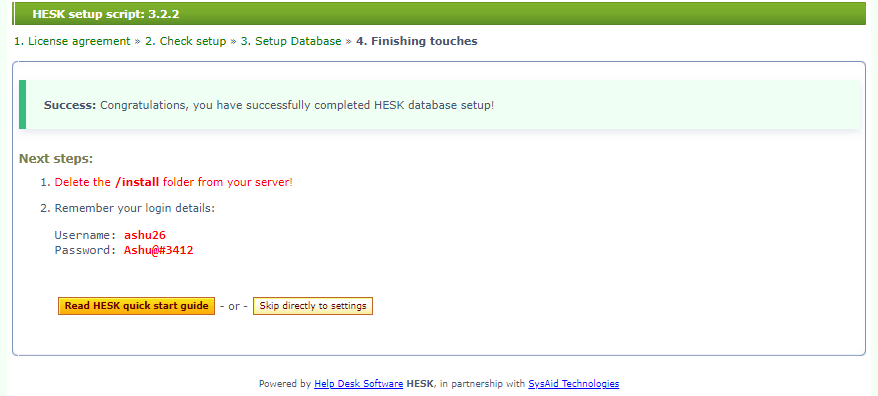
Step5: in this step, it will tell you to delete the install folder from the server, also get the administration id and passwords. Then go to the admin URL and log in to your account.