What is Webtrees #
Webtrees is an open-source application used. It is an online collaborative genealogy application. Due to it is free so anyone can use it for their use. For installation of this software, you need PHP and MySQL. Here we are going to know about how to install software applications using a softaculous app installer and also manually.
Uses of Webtrees #
- Organizations
- Companies
- Schools
System requirements of Webtrees #
- PHP
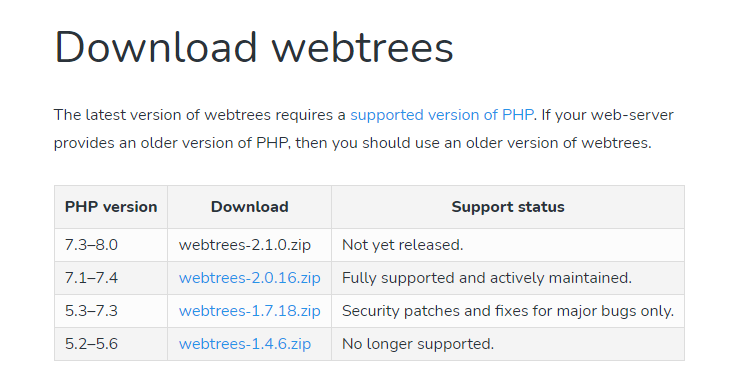
- for version 7.0 or earlier use 1.7.18.zip.
- for version 7.1 or 7.4 use 2.0.16.zip.
- Database
- MySQL – use version 5.7 or higher
- MariaDB – use version 10.3 or higher
- PostgreSQL – use version 9.6 or higher
- SQLite – use version 3.8.8 or higher
- SQL-Server – use 2017 or higher
- Webserver
-
- Apache
- Nginx
- IIS
Features of Webtrees #
- Collaboration
- Share your information with friends family. You can edit it also.
- Privacy
- It keeps your information safe.
- Reports
- Make your reports in charts and text formats
- Calendar
-
- View events from today, this month, and yearly.
Installation of Webtrees #
The installation process for Webtrees has 2 methods you can use any one of them for installation. The methods are as follows
- Installation using softaculous app installer
- Manual installation
Installation using a softaculous app installer #
For installation of Webtrees using a softaculous app installer follow the steps.
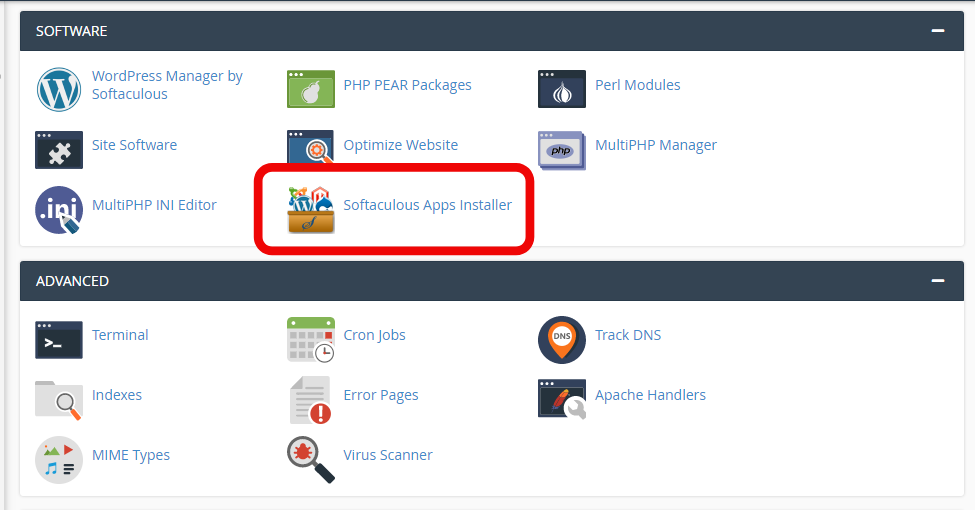
Step1: login to your hostrik Cpanel account, go to the software section and click on the softaculous app installer. A new window of the softaculous app installer will open.
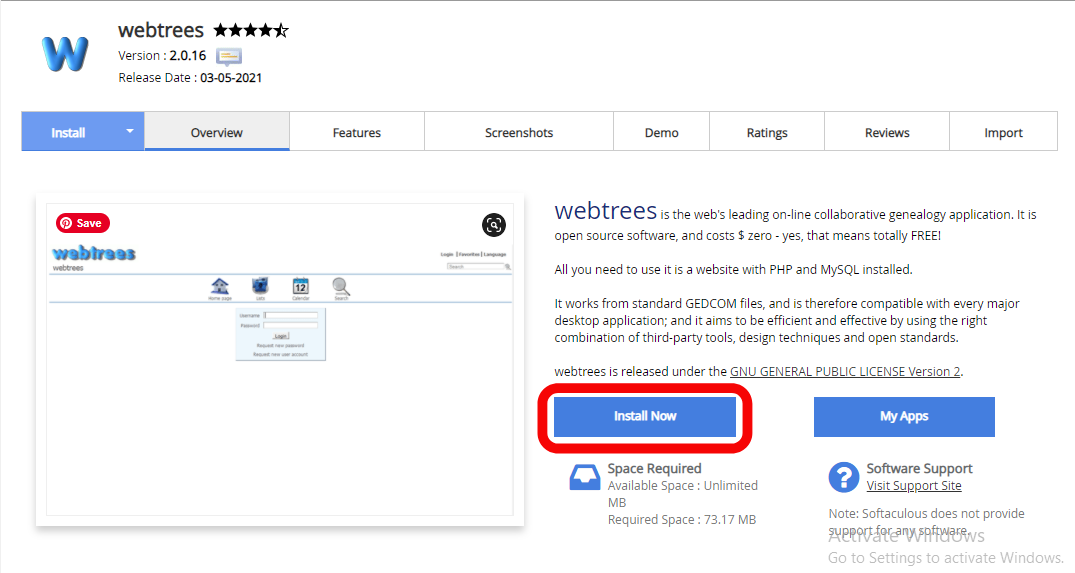
Step2: Type Webtrees on the search box of the softaculous and press enter, installation window of Webtrees will open, click on install.
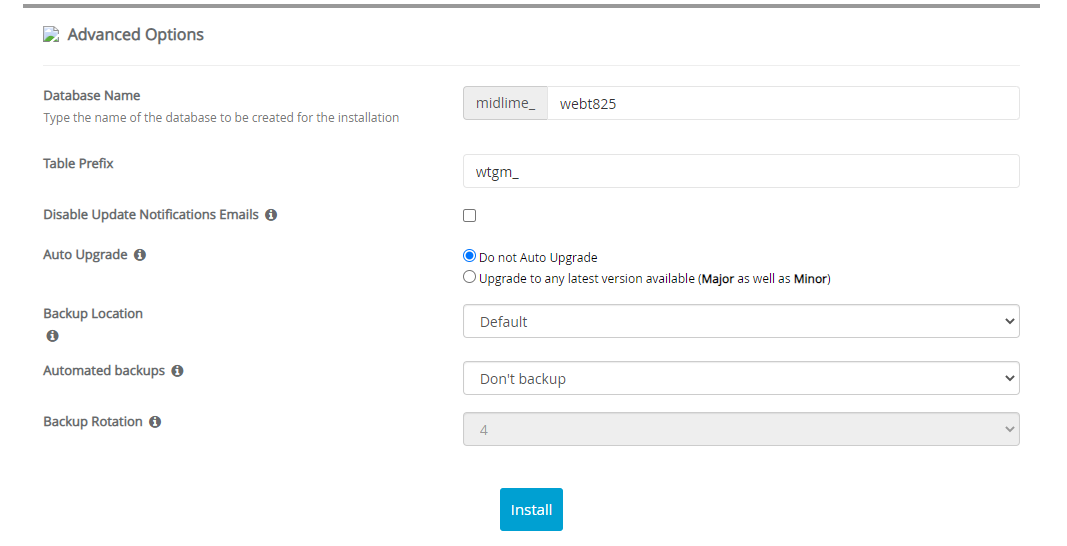
Step3: in that interface, you will see 5 parts
Step4: Choose the protocol of the website (HTTP:// or HTTPS://) for your blog. then Choose the domain you want to install Webtrees.
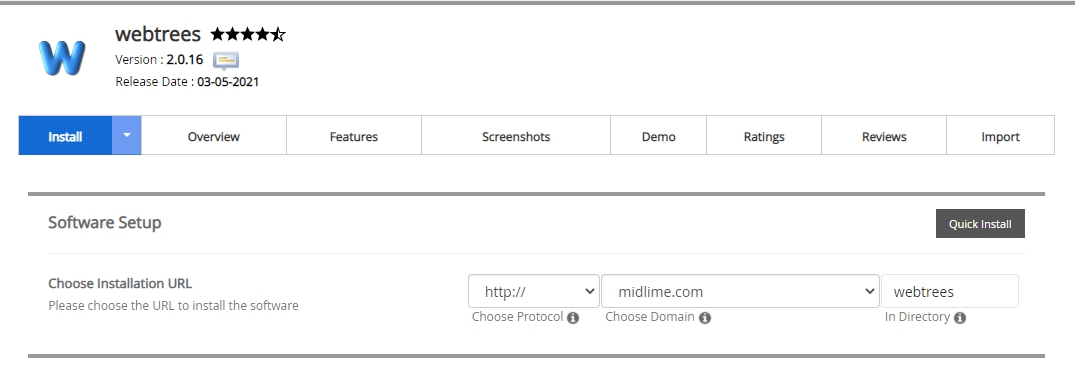
Step5: Give the name of the site.

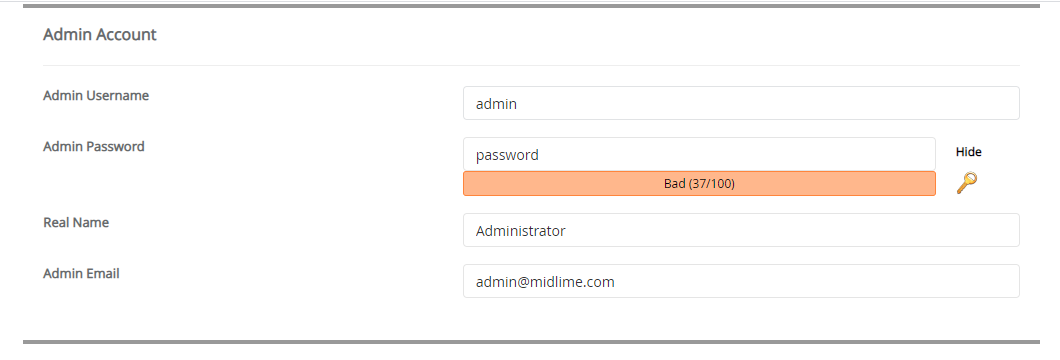
Step6: In the admin account select the username of your account. In the password, the section chooses the password of your account. Also in write the admin mail for your site
Step7: choose the language for the installation of software.

Step8: In the advanced option select the database and backup for your blog if you want otherwise-click install.
Manual installation #
For manual installation of Webtrees, you have to follow some steps, the steps are divided into 3 parts.
- File configuration
- Database creation
- Site configuration
Setting up file
To set the Webtrees files perform the following steps
Step1: go to the official website of Webtrees download the version of software you want in the ZIP format.
Step2: login to Cpanel of your hosting, go to file manager,
Step3: paste the file you downloaded in the public_html directory of your domain,
Extract that file.
Creating database
To create a database perform the following steps
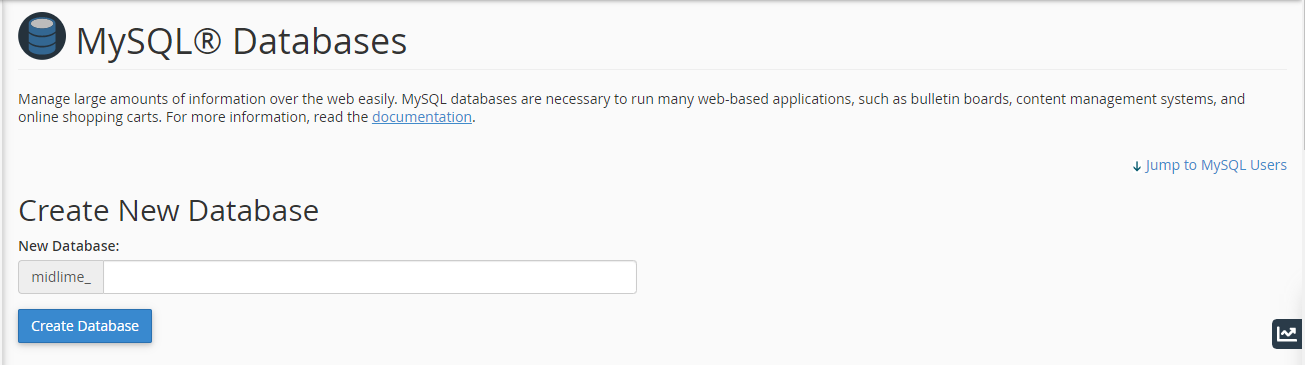
Step1: go to MySQLDatabase, give a name to the database, and click create the database.
Step2: In the next step add a user to the database, add the username of the user, write a password, and then click create a user.
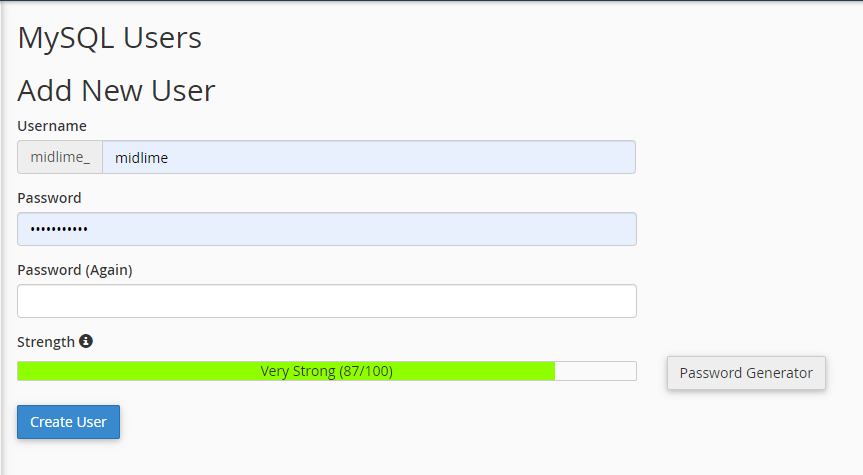
Step3: In the next window give all privileges to the user.

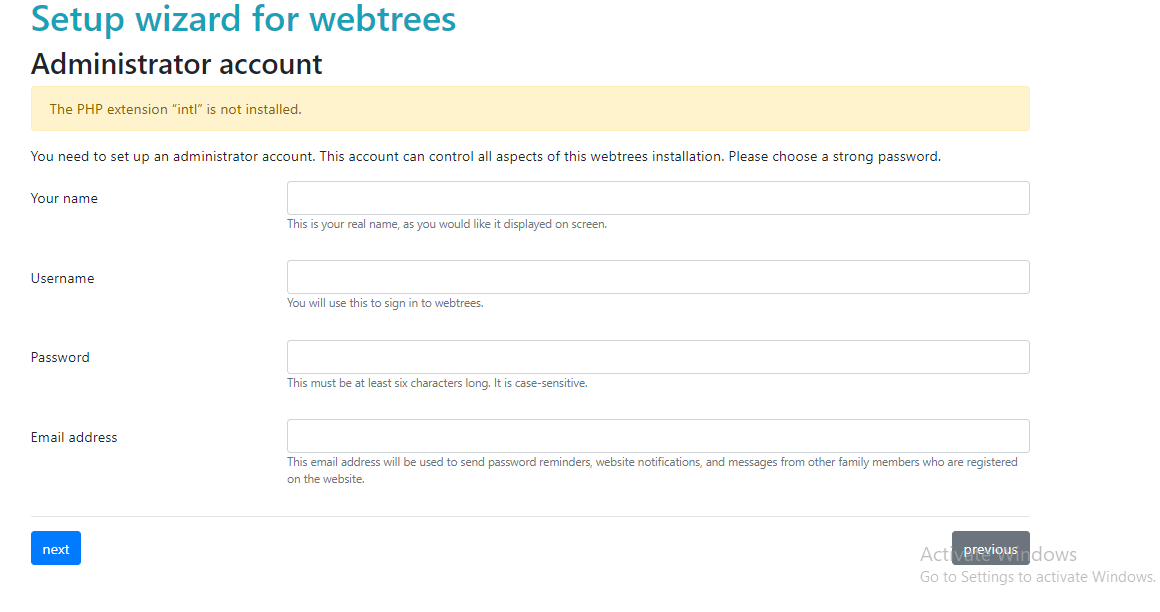
Site configuration
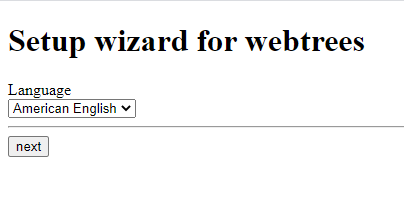
Step1: go to the URL you are going to install webtrees, select the language for installation and click next.
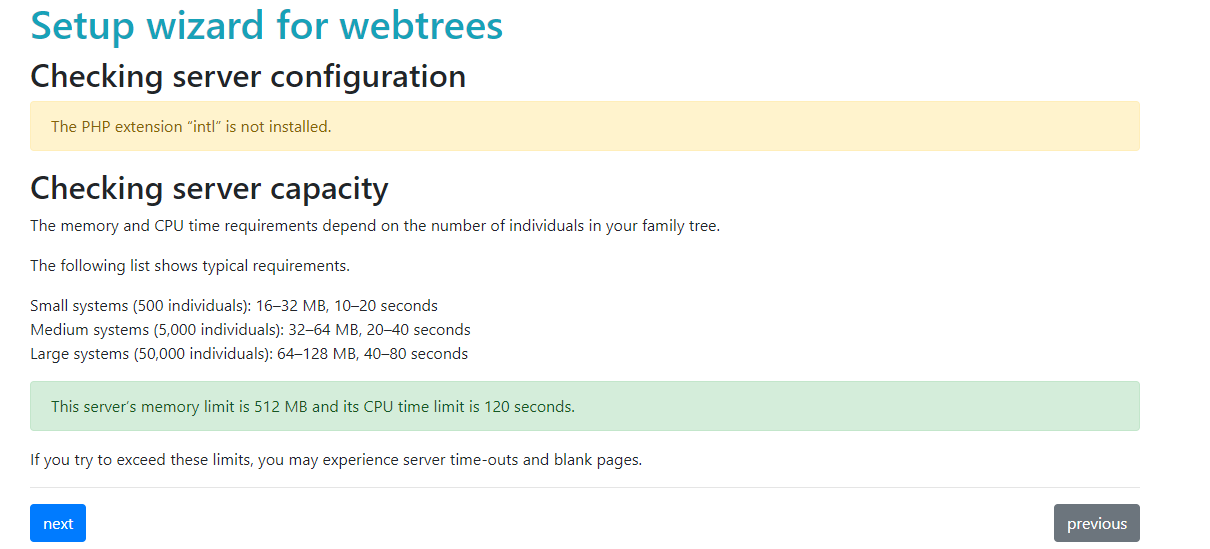
Step2: in the second step it will check the server configuration. When it all ok click on next.
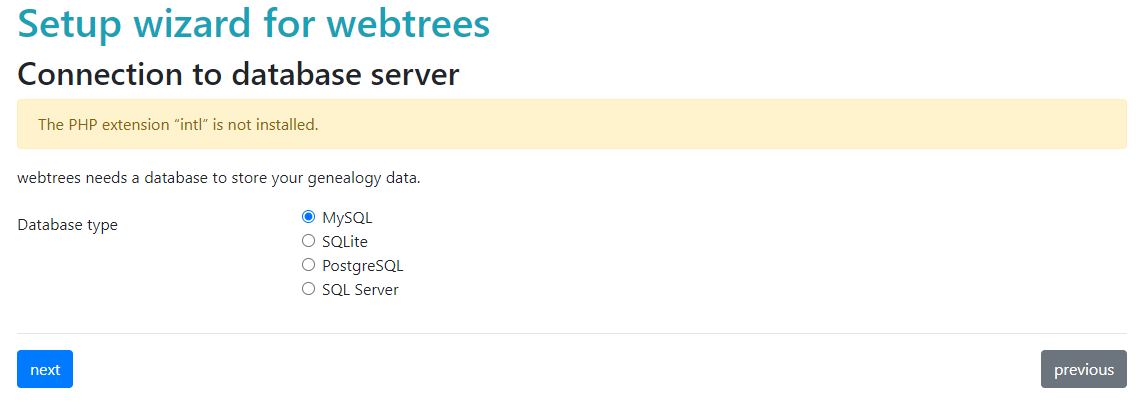
Step3: In the next step check the database connection with the server, select the database type and click on next.
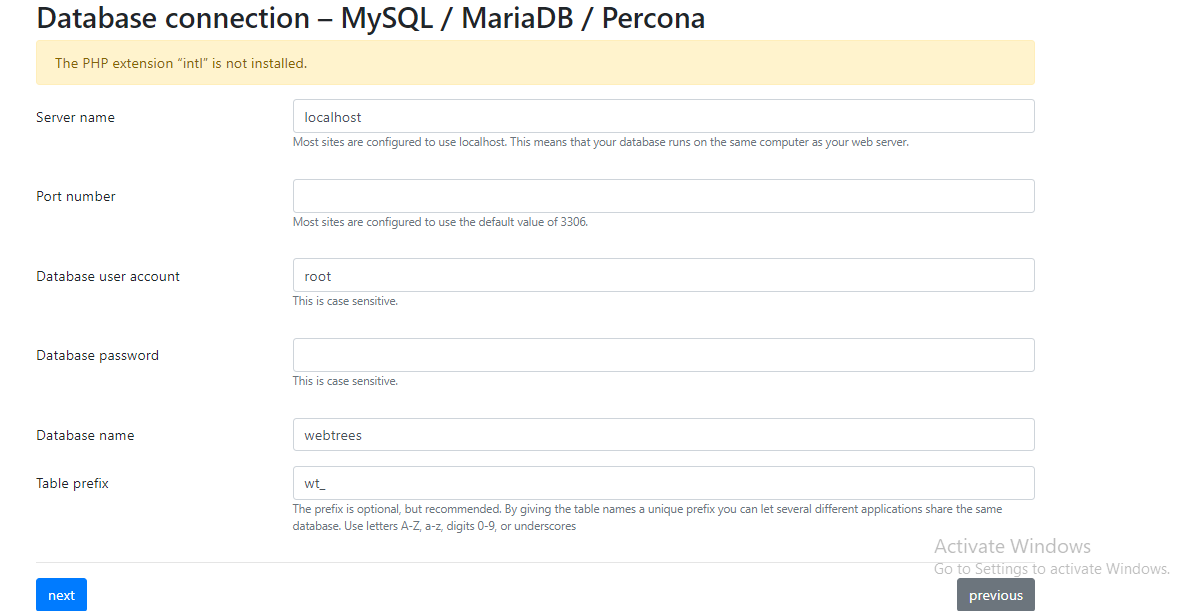
Step4: in step 4 connect the database you created in the above step with it. And click on next.
Step5: In the next step give the information about the administration, give your name email and username, passwords. Then click on next.
Step6: in the next step, you will see the installation process is completed. You can create your first family tree.


