What is Claroline? #
Claroline is an open-source collaborative eLearning and working platform, written in PHP programming language and runs on Linux, Mac, OS, and Microsoft Windows. It uses MySQL database. It was released under the General Public License (GPL). It allows hundreds of organizations worldwide ranging from universities to schools and from companies to associations to create and administer courses and collaboration spaces over the web. It allowing teachers to build effective online courses and to manage learning and collaborative activities on the web.
It was translated into 35 languages and it has a large worldwide users and developers community. That eLearning platform designed by teachers resulting in reliable software for your online training. It is downloadable, free of charge, supported by a community of users and developers. Accompanied with service, plans to offer support for schools. It might be one of the finest open-source solutions for educational institutions.
Features of Claroline #
- Custom user login page
- Manual account
- Manage documents and links
- Create online exercices
- Develop learning path
- Coordinate group work
- Self-Registration
- Create categories
- Manage categories
- Produce: assignments and wiki
- Discuss: Chat and forum
- Organize: agenda and announcements
- Supervise: Users and statistics
Requirements of Claroline #
- Web server (Apache recommended)
- PHP>=5.1 scripting environment configured with these modules: MySQL, Zlib, Preg.
- MySQL>=4.23
- MTA (Optional, but highly recommended)
How to install Claroline using Softaculous #
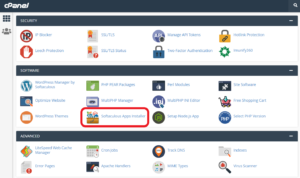
Step 1. Go to cPanel
Step 2. Under the software, section click on the “Softaculous App Installer” button
Step 3. On this window, you see a sidebar on the left side select “Educational” then scroll down to the “Claroline” click there 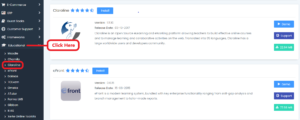
Step 4. After clicking open new interface here click on the “Install Now” button
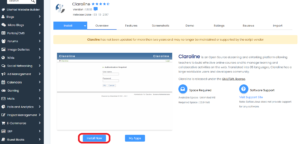
Step 5. On the new window, you fill in the information
Step 6. First, choose the installation URL
Step 7. Next box choose Protocol
Step 8. Then next box Choose the Domain
Step 9. Then choose in a directory
Step 10. Then type Site name
Step 12. Then Create your administrator user name, password
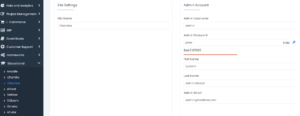
Step 13. Then write your first name and last name
Step 14. Write Email in the Email box.
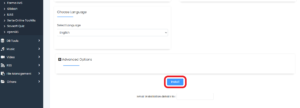
Step 15. Click on the install button at the bottom of the page
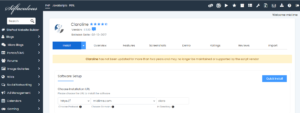
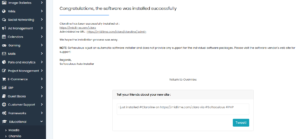
Step 16. You will get confirmation of successful installation on the interface.
Visit us hostrik.com


