What is Yclas? #
Yclas is a self-hosted, free, open-source powerful PHP classifieds script that can help you start a website and turn it into a fully customizable classifieds site within a few seconds. It is written in PHP programing language.
It is a revolutionary platform that enables anyone with little or no knowledge at all in website design to create their own marketplace. That is a platform that helps people to create any classifieds site in few minutes, even they have no programming skills. Users can also create their classifieds app, for Android, and ready to upload it to their market profile.
Thousands of web developers trust Yclas to run their big classifieds website. It can be used to create car/auto sales, job search boards, buying and selling real estate, and almost anything you can think of. When you’re ready for more, there are themes and premium support available to transform your site into anything you can imagine
Features of Yclas #
- Create a website easily
You can have your site ready without worrying about technical or hosting issues, and you don’t need any web development knowledge. It is designed to be user-friendly and cover all aspects you need when creating a classifieds site.
- Make money now
We can integrate the most useful payment gateways to cover your customers wherever they are. Get money from your classified site by creating memberships, featured, and Adsense. Now you can accept Paypal, Stripe, escrow.com, 2co, Mercado Pago, and other eight payment gateways.
- Mobile ready and Native Apps
Use of it your website create responsively and look awesome on any mobile device and also you want to add value to your project, you must have our native iOS and Android Apps. It created to reach your customers, audience, no matter what they are using.
- Endless design and customization
There is fourteen curated design inspired by the top marketplace. Users can change skins, any text that shows up on your site, add different widgets to the sidebar on the home base and by category, custom CSS, insert your logo and choose from different layout options.
- Advance Management
Users can create categories, define locations, enable chat, control spam, allow Google maps, set an expiration date for ads, send confirmation emails, coupons, system, export your data, force users, before posting, enable social login, advanced search, and add content to your site in an easy and accessible way.
- Create content that matters
We implement content management features such as: create pages, modify translations and create new ones, change email copies, send newsletters, create a blog, create FAQs, create forums, manage media, and much more.
- SEO friendly
When you create your website using Yclas your site will be using the best practice of Search Engine Optimization automatically saving your time efforts, and technical knowledge. Auto meta descriptions, keywords, auto-generated sitemaps, friendly URLs, Robot.txt, auto-generated RSS feed, smart 404 pages, analytics integration, and much more. Easily rank on Google without understanding what SEO is and beat your competitors at SERPs.
Requirements of Yclas #
- A computer that has a working internet connection
- An internet browser
- A web hosting that supports:
- Apache 2+
- PHP7
- Short Tags
- GD support
- Mod_rewrite
- Gettext
- Curl
- MySQL 5+
- OpenSSL
- Soap client
- ZipArchive
- Be sure the PHP-ini has short_open_tag = on
How to install Yclas using Softaculous #
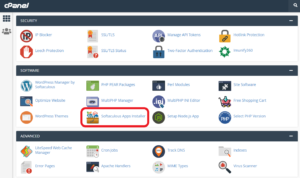
Step 1. Go to cPanel
Step 2. Under the software, section click on the “Softaculous App Installer” button
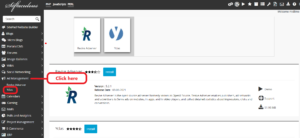
Step 3. On this window, you see a sidebar on the left side select “AD Management” then scroll down to the “Yclas” click there
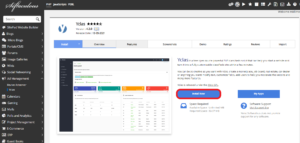
Step 4. After clicking open new interface here click on the “Install Now” button
Step 5. On the new window, you fill in the information
Step 6. First, choose the installation URL
Step 7. Next box choose Protocol
Step 8. Then next box Choose the Domain
Step 9. Then choose in a directory
Step 10. Then type Site name
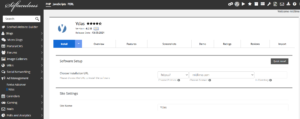
Step 12. Then Create your administrator user name, password
Step 13. Write Email in the Email box.
Step 14. Next box select language which you can use
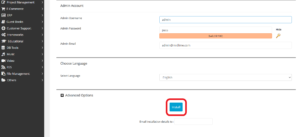
Step 15. Click on the install button at the bottom of the page
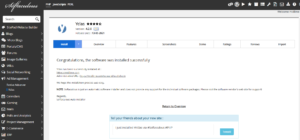
Step 16. You will get confirmation of successful installation on the interface.
Visit us hostrik.com


