What is Concrete5 #
Concrete5 is a website builder launched in 2003. It is one of the most popular website builder tools. It is open-source and anyone can download and use it. Concrete5 gives you the ability to go to any page and start editing is one of the easiest software to use. Its toolbar made easy to use. you get the best of the worlds. Anyone can start making their website, and the editing experience is easy. With concrete developers gets easy to make changes to their website.
Uses of Concrete5 #
These are the following industries where concrete5 is used for developing websites.
- Online magazines
- eCommerce sites.
- Extranets and Intranets.
- Government websites.
- Small business websites.
- organization websites.
- Community-based portals.
- Church, club, and team websites.
- Personal website.
- Marketing-focused sites for a corporation.
- Any school, college, or university website.
- online communities.
- Anything else
System requirements for concrete5 #
To use conccrete5 your system must follow the following requirements
- PHP
- concrete5 is written primarily in PHP.
- For installing concrete5 you must use PHP version 7.1 or higher version.
- Webserver
- The CMS works with both Apache and Nginx and is also made to work with IIS.
- But mainly support to Apache and Nginx
- Database
-
- Concrete5 works with both MySQL and MariaDB
- If you are using MySQL then Make sure you use database version 5.1 or higher.
Installation of Concrete5 #
For installation, your system must follow some requirements if your system follows the requirements then you can install concrete5 on your system. There are two methods to install software on your system.
- Using auto-installer.
- Manual installation.
Using auto-installer. #
To install concrete5 using the auto-installer(softaculous) you have to follow some steps
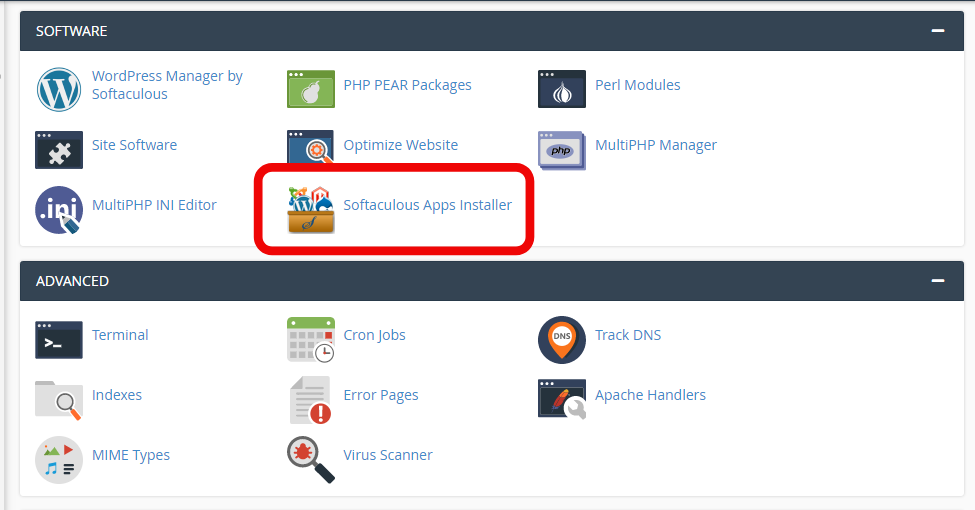
Step1: login to Cpanel of hostrik hosting account, go to the software section of Cpanel, click on softaculous app installer, a new window will open
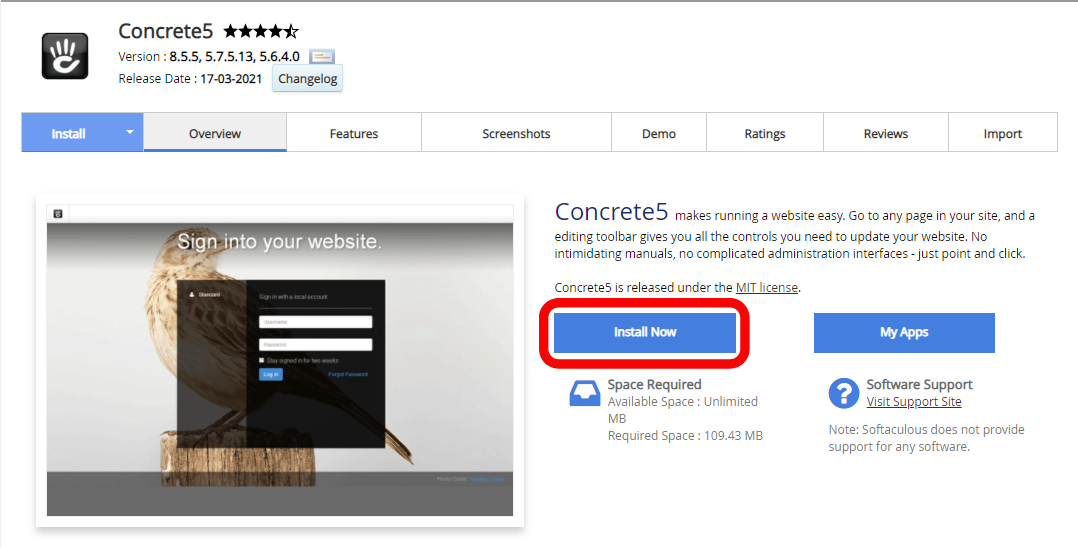
Step2: type concrete in the search box of softaculous and press enter, you will see the concrete5 installation window, click on install.
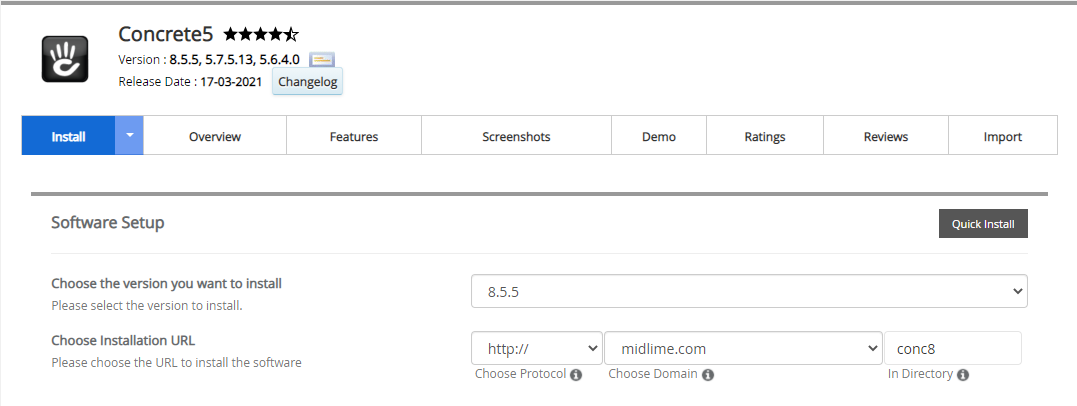
Step3: in the 3rd step choose the version you want to install from the dropdown menu.
Steep4: select the protocol of your website (HTTP:// or HTTPS://) select the domain you want to install and directory also.
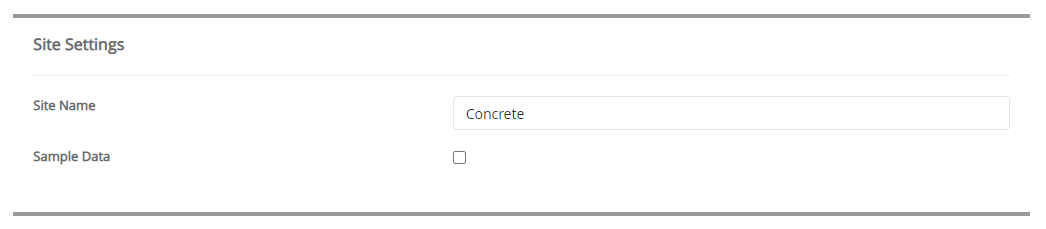
Step5: Next step gives the name to your site.
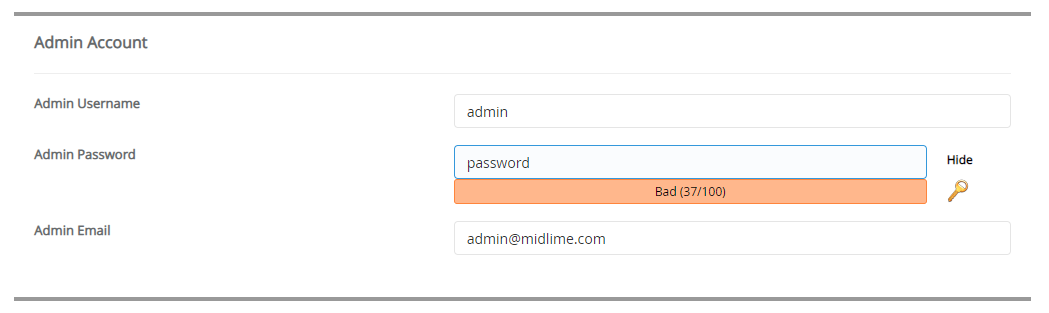
Step6: after giving the site name in the next section, give information about the admin account, give the username and password of your admin account, and the admin account’s email.
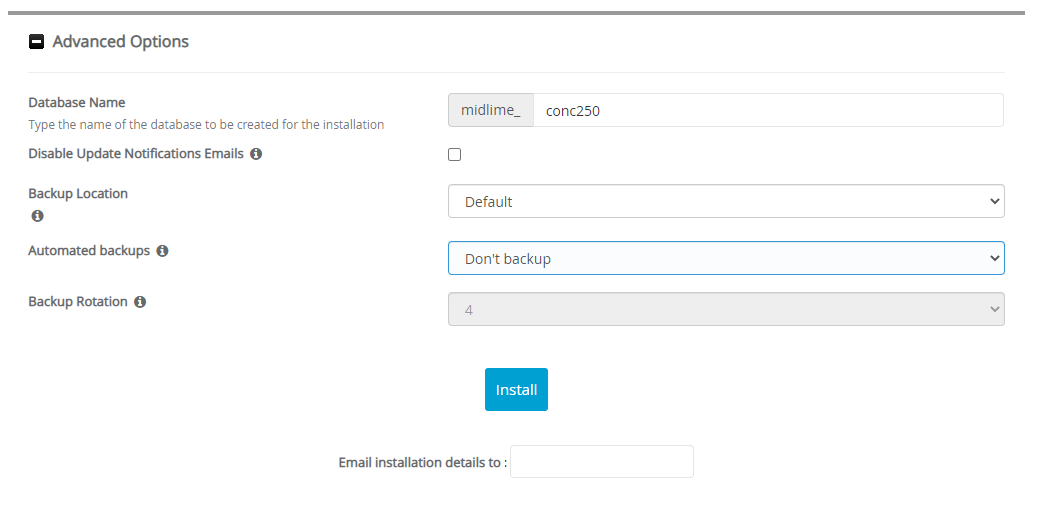
Step7: in the advanced option-click the plus sign here you have to give the database name and backup information about the database. After that click install to install the database on your system
Manually installation #
To install concrete5 manually into your system you have to follow some steps, the steps are divided into 3 parts that are
- File configuration
- Database configiration
- Site configuration
- File configuration
-
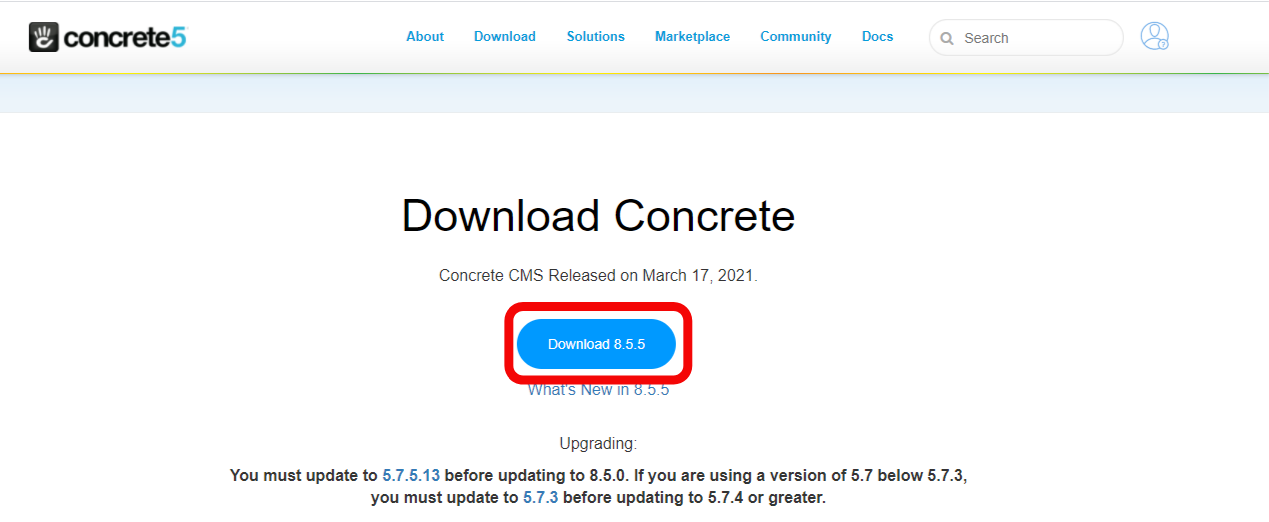
- Go to the official website of concrete5 and from the download section download the latest version of concrete5 in zip format
-
- Extract the file and using FTP upload that file in the public_html folder.
- Database configiration
-
- To create the database you have to follow the steps
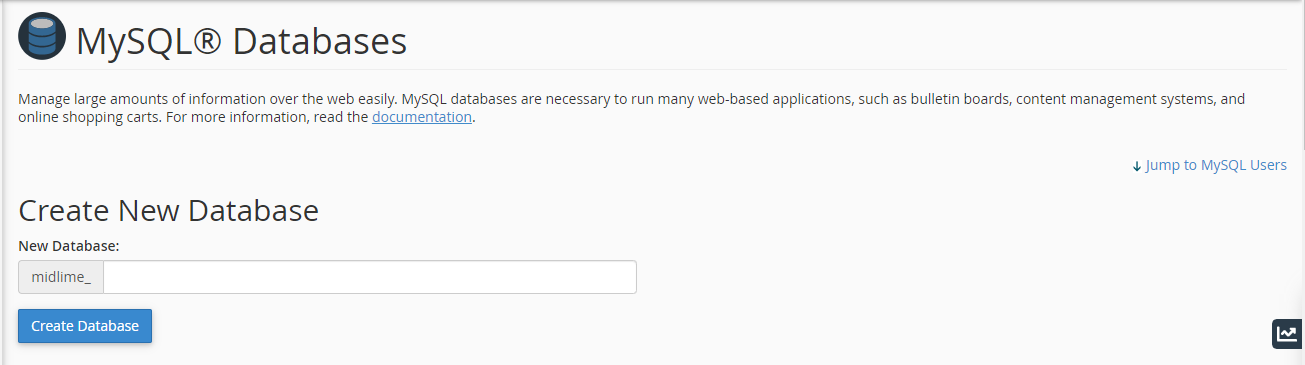
- Go to the database section and click on MySQL Database o create the database.
- In the next step type the database name and click create the database, you will see a message that you have created the database successfully.
-
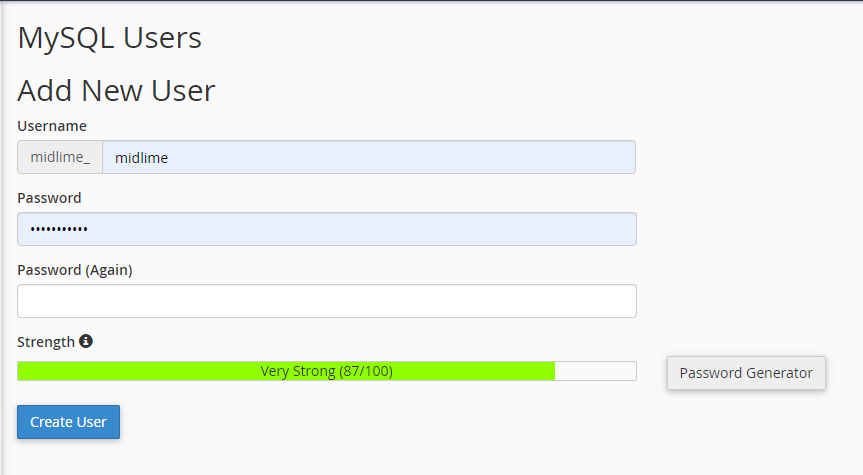
- Then add the user to the database using add user, here give the username to the database and password, and then click on create the user.
-
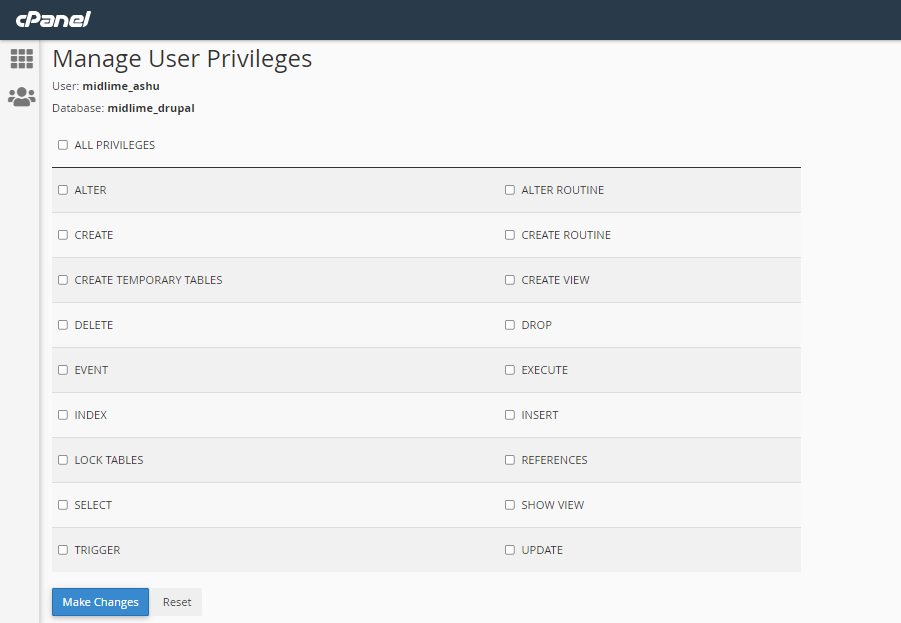
- Then give all privileges to the user.
- Site configuration
-
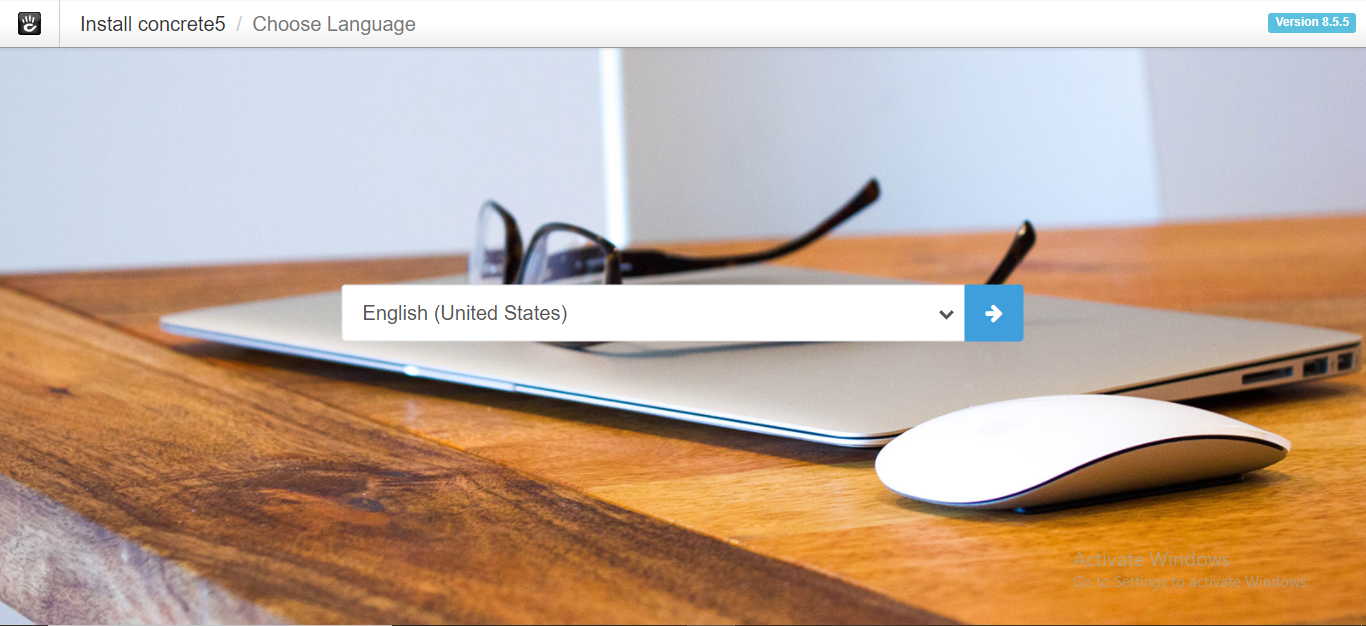
- Go to the installation URL you will see the installation process of conccrete5, choose the language you want to install. Click next
-
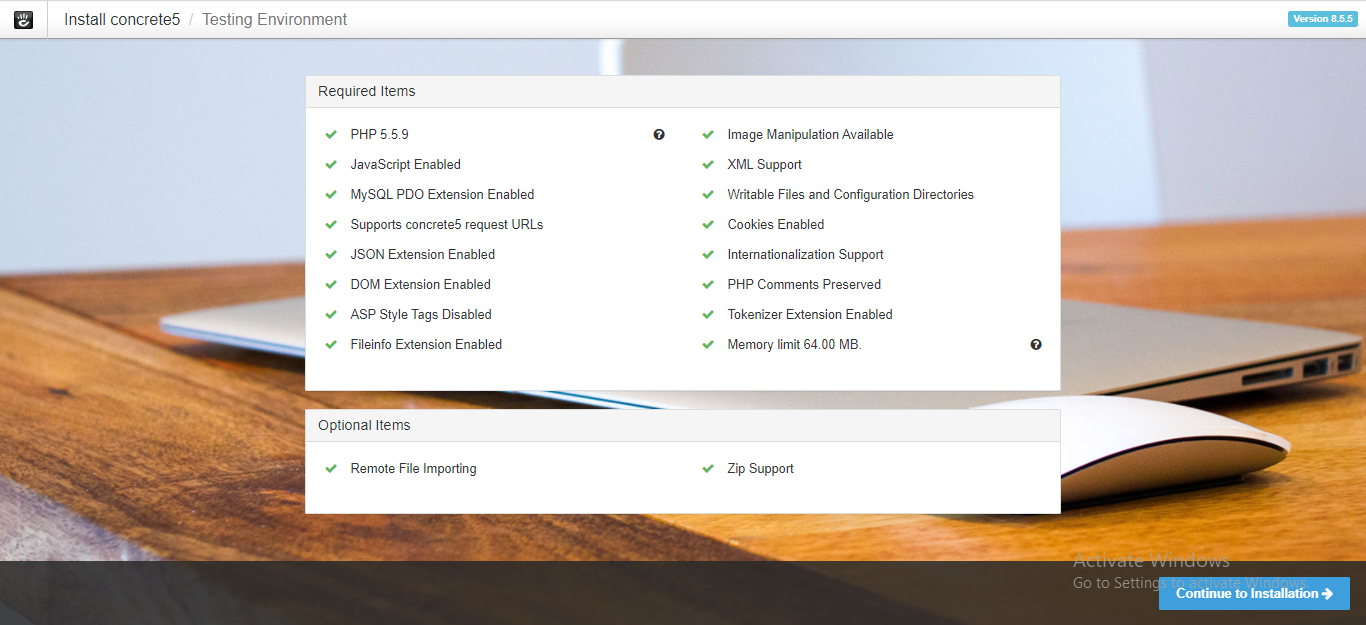
- After choosing language check the requirements of concrete5 and give a message if the requirement is not fulfilled. If your system fulfilled the requirements click continue the installation.
-
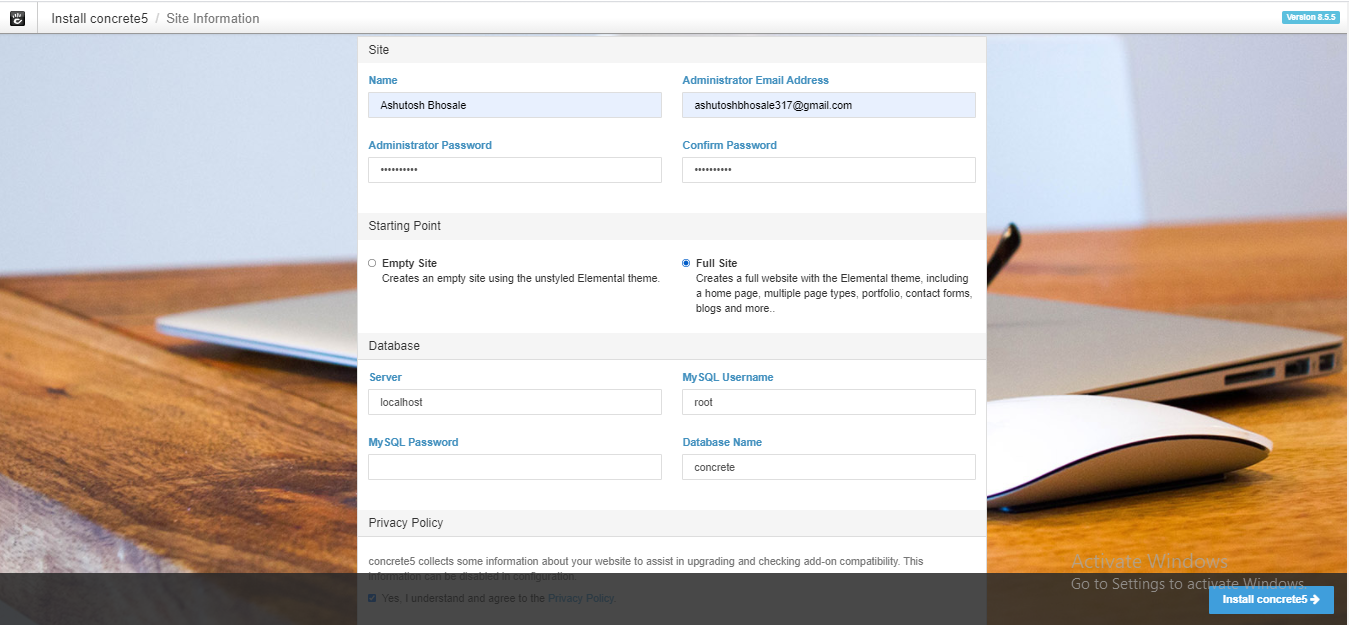
- After that give the site name and in admin give the admin account email id and type password of the admin account, and in-database section give database server name localhost and type username and password and also give database name. And click continue to install.
-
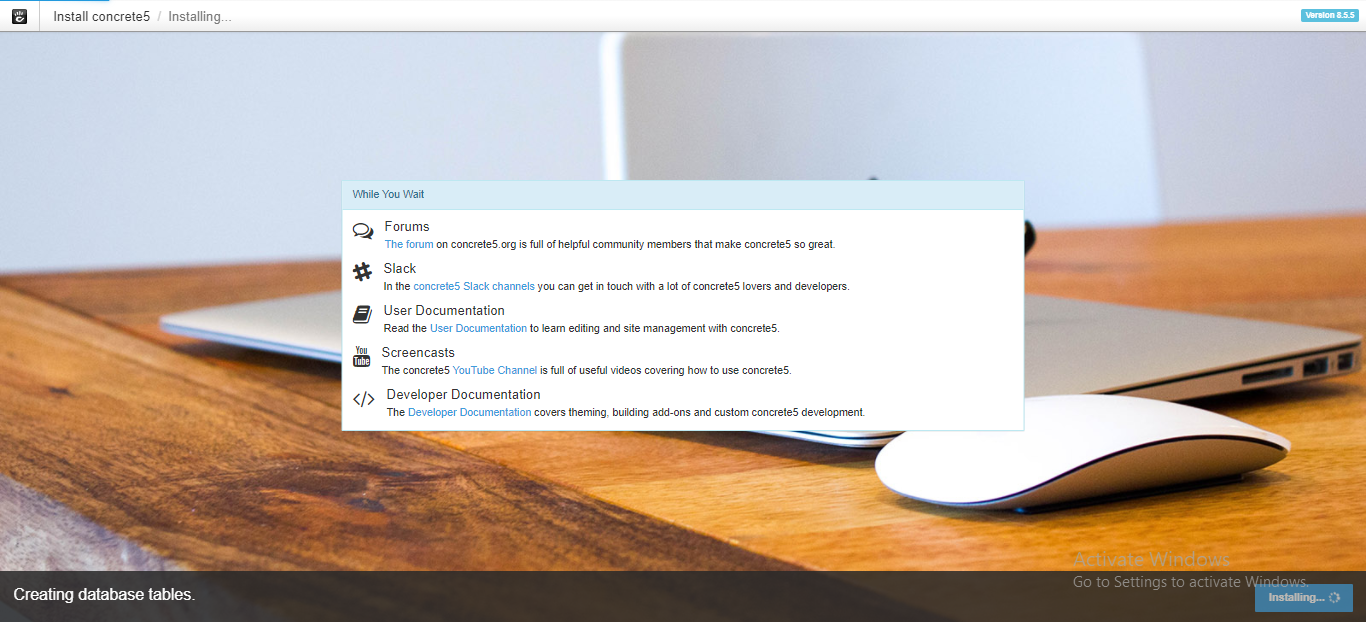
- You will see the installation process starts.
-
- After installation start editing your website


