What is WebCalendar? #
WebCalendar is an open-source PHP-based multi-user calendar. It was initially released in 2000 and can be configured as a single-user calendar for groups of users, or as an event calendar viewable by visitors.
It is available under the GNU General Public License. Mostly it required for MySQL/MariaDB, SQLite 3, Postgre SQL, Oracle, DB2, Interbase, MS SQL, server, or ODBC.
Features Of WebCalendar #
- Group support
- Multi-user support
- View another user’s calendar
- View day-at-glance
- View month-at-glance
- View week-at-glance
- View year-at-glance
- View multiple users calendar at the same time
- View one or more users calendar via layers on top of your own calendar
- Public calendar where anonymous users submit events that that are approved by an administrator
- Add/Edit/Delete users
- Add/Edit/Delete event
- Reporting events
- Online help
- Custom event fields
- Search interface for calendar entries
- User-configurable preferences for colors, 12/24 time format, week start on Sunday or Monday default work hours
- Email reminders
- Email notifications for new events
- Checks for multiple timezones
- Support for 30 different languages
- Users can accept or reject events added by another user to their calendar
Requirements of WebCalendar #
System Requirements
- PHP 4 (PHP 5 not yet tested)
- Database
- CSS – enabled browser
- Javascript – enabled browser
- If not using HTTP-based authentication then browser cookies are required
Database Requirements
- MySQL
- Oracle 8
- Interbase
- PostgreSQL
- MS SQL Servers
- ODBC (PHP ODBC includes support for Adabas D, IBM DB2, Solid and Sybase SQL Anywhere as well as ODBC)
How to install WebCalendar using Softaculous #
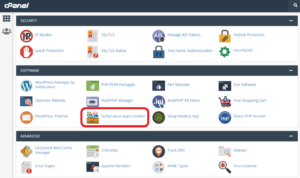
Step 1. Go to cPanel
Step 2. Under the software, section click on the “Softaculous App Installer” button
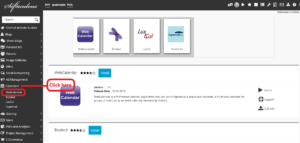
Step 3. On this window, you see a sidebar on the left side select “Calendar” then scroll down to the “WebCalendar” click there
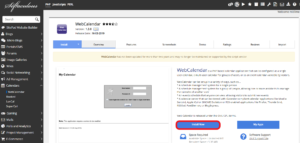
Step 4. After clicking open new interface here click on the “Install Now” button
Step 5. On the new window, you fill in the information
Step 6. First, choose the installation URL
Step 7. Next box choose Protocol
Step 8. Then next box Choose the Domain
Step 9. Then choose in a directory
Step 10. Then type Site name
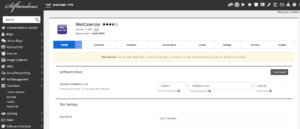
Step 11. Then Create your administrator user name, password, then enter the real name
Step 12. Write Email in the Email box.
Step 13. Next box select language which you can use
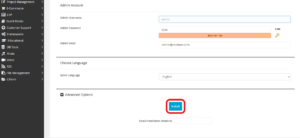
Step 14. Click on the install button at the bottom of the page
Step 15. You will get confirmation of successful installation on the interface.
Visit us hostrik.com


