What is CMS Made Simple? #
CMSMS is the simple content management software that is built in PHP which helps to separate content, functionality, and templates. CMS made a simple first release in July 2004 and it is under the GPL and it remains free till the date. With the use of CMS-made simple, you can design any website or develop it. It is useful for the developer’s designers and editors also. CMS-made simple developed by the international volunteers who give their time to developing the CMSMS. In this guide, we are going to learn how to install the CMS made simple.
Uses of CMS made simple. #
- For Editors
- For designers
- For developers
System requirement for CMS made simple #
- Operating system
-
-
- Linux
- Mac os
- Windows
-
- Webserver
-
-
- Apache
- NGINX
- Lighttpd
-
- PHP
-
- Minimum 5.6
- Recommended 7.3
- Maximum 7.4
Installation of CMS made simple #
For installation of CMS made simple, there are 2 methods available you can use one of them for installation of CMSMS
- Installation using softaculous app installer
- Manual installation
Installation using softaculous app installer #
You can use a softaculous app installer to install CMS made simple on your hosting, for installation of CMS made simple you have to follow the following steps
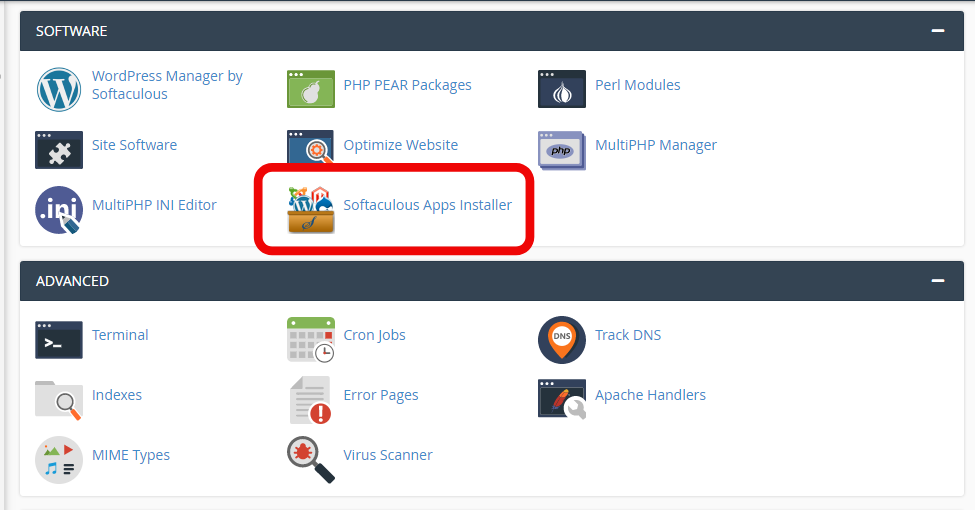
Step1: login to your hostrik Cpanel account and go to the software section and click on the softaculous app installer. The installation window of the softaculous app installer will open.
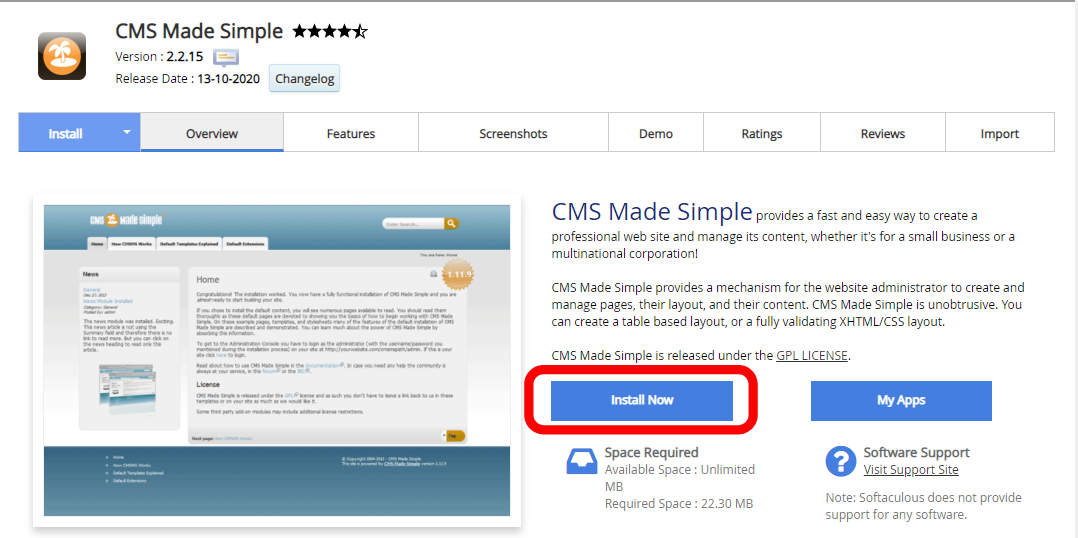
Step2: in the softaculous app installer type cms made simple in the search box and press enter. Installation window of CMS made simple will open on that click on install.
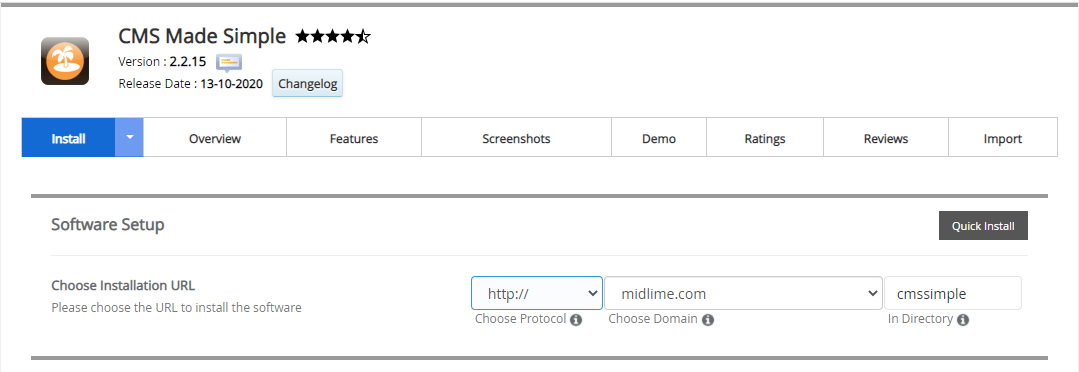
Step3: In the next window select the protocol of your website (HTTP:// or HTTPS://) and then select the domain you want to install the site on. And the directory where the site going to install.
Step4: give the name to the site in site settings.

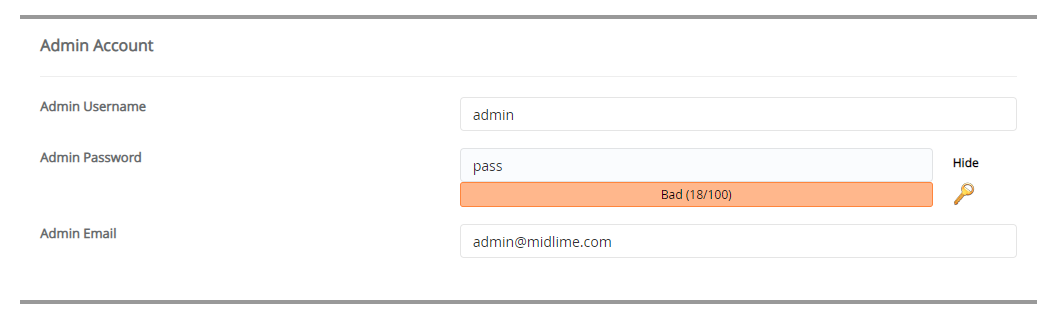
Step5: in the admin, account setup create the admin account by giving the admin username password and email of the admin account.
Step6: give the language of your site in the choose language section

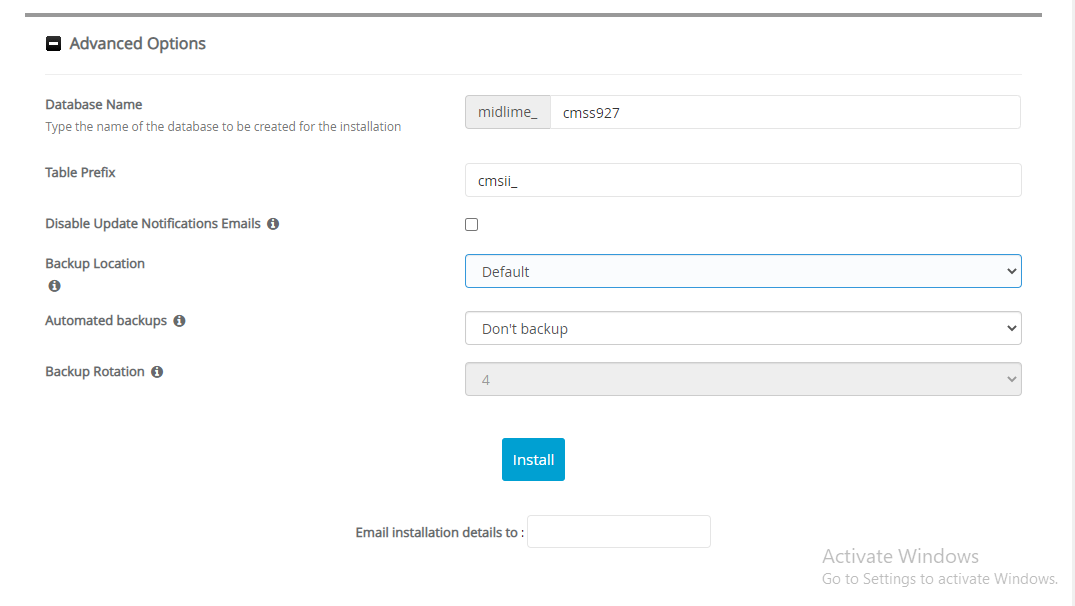
Step7: In the advance, section selects the database name and also select the backup option for the database then click on install. These are the installation methods using a softaculous app installer.
Manual installation #
For manual installation of CMS made simple, you have to follow the steps, the steps are divided into 3 parts
- File configuration
- Database creation
- CMS made simple configuration
File configuration
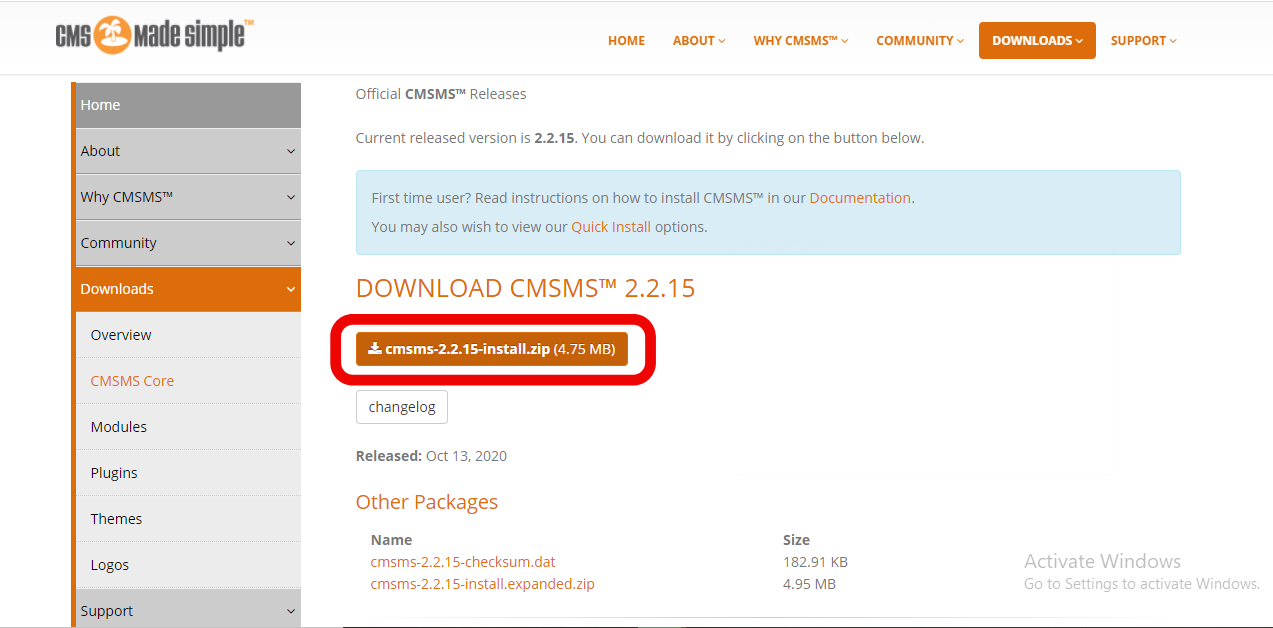
Step1: go to the official website of the CMS made simple and from the download section download the latest version of the CMS Made simple
Step2: login to your Cpanel account and in file manager upload the file in the public_html folder of the domain you’re going to install the CMS made simple
Step3: after upload extract the file in that folder itself.
Database creation
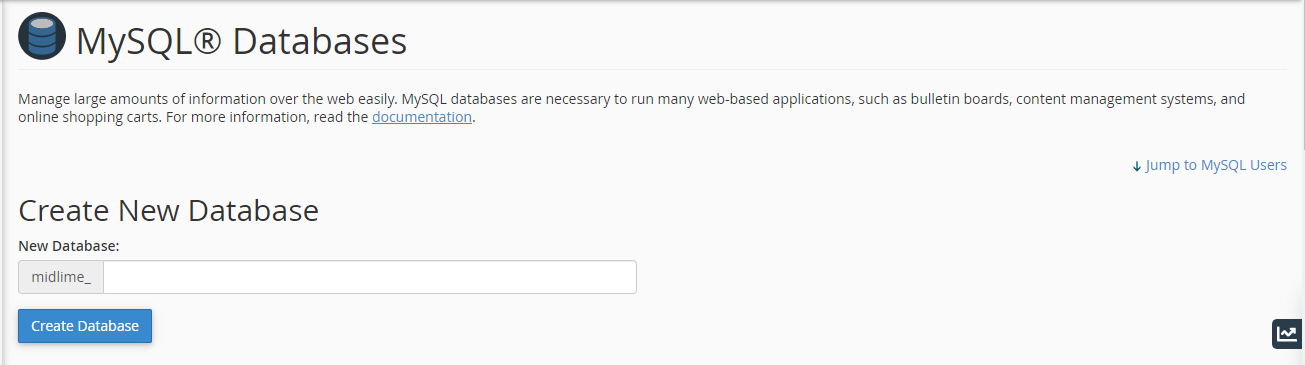
Step1: in your hostrik Cpanel account go to the database section and click on MySQL database
Step2: create the database here by giving the name to the database and click on create database.
Step3: After creating a database add a user to it for that in add user section give the username and password of the user and click on create a user.
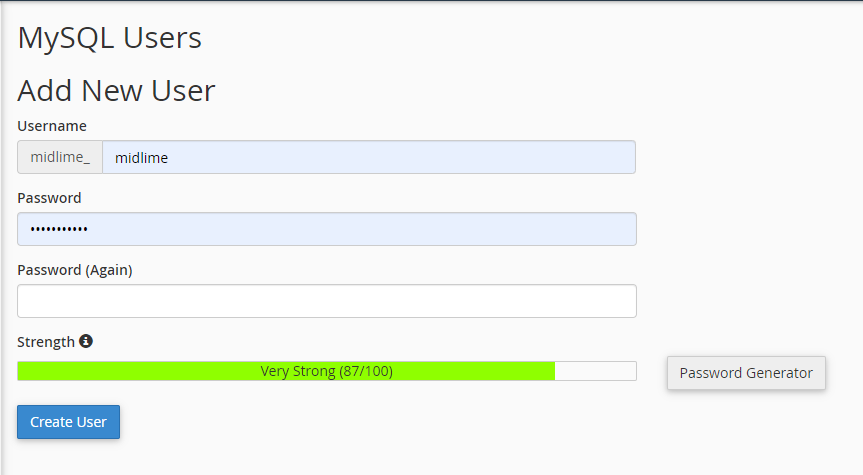
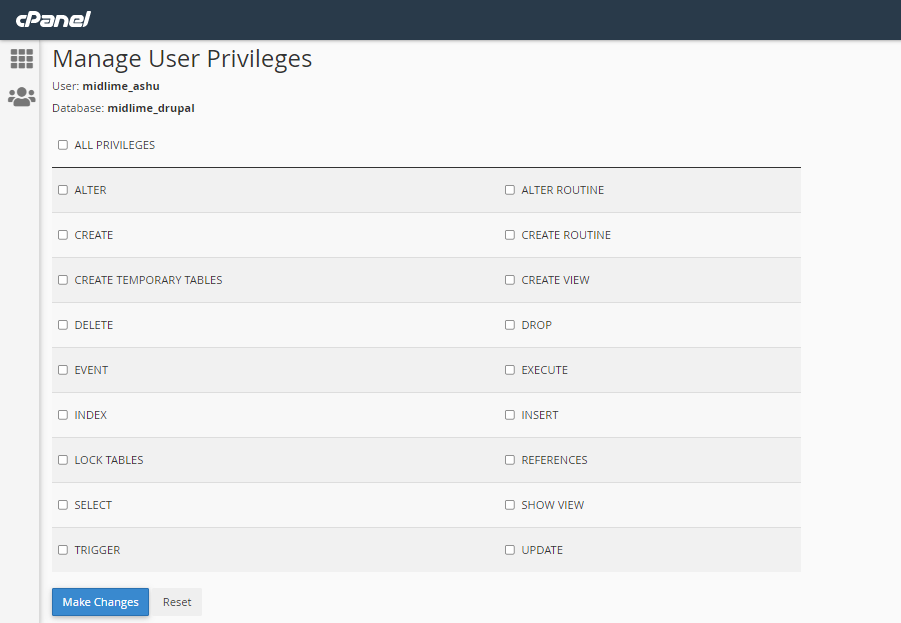
Step4: After creating the user give them all privileges by clicking all privileges.
CMS made simple Configuration
Step1: at the starting, you will see the welcome window of the cms made simple select the language you want to install in software and turn on the advanced mode it will give enables
The addition potion and also increases verbosity
Step2: the second step checks the installation software of CMS-made simple. If your system contains the software it will give you access to go further.
Step3: in step 3 software checks the PHP environment for installation, if there is an issue it will give you a message, and if it’s ok it will be to proceed
Step4: This step asks you for information about database configuration for your site, it asks for the database information and credentials, and a server time zone.
Step5: This is the installation process basically for admin account configuration This Admin user account allows you to log in. Add an email address there to recover the forgotten password.
Step6: This step asks you to give the site name and also select the additional language for your site.
Step7: This step copies all of the CMSMS core files from within the installation assistant.
Step8: This step interacts with the database and checks all tables are created correctly and initial content is added or not.
Step9: This step gives you the message that the installation completed


